Reply with Quote
Hi,
any news?
C-Ya Adrian


Originally Posted by Stang6T8Coupe

I could do that but sometimes I make changes after the parts are done. Long after the block and heads were done, I made the head gaskets and changed the block to give better gasket surface. Things change and it could effect a part that you may have already made. It could turn into a pile of $hit. I would rather be happy with it as a whole before I give out anything.
Hi,
any news?
C-Ya Adrian
I made a crankshaft but I'm not happy with it so it went into the trash. I got distracted with a cannon that uses flash powder to shoot BB's. Then I repaired a steam engine for a friend that was a gift from his dad many years ago. Had to make some pieces that had gotten lost. I plan to get the garage cleaned up and get going on the V8 again real soon.
Steve,
Please document the procedure for making the crankshaft.
More pictures are better.
Jeff...
Patience and perseverance have a magical effect before which difficulties disappear and obstacles vanish.
1. Obtain a piece of steel a little larger than the finished crankshaft.
2. Cut away all metal that does not look like the crankshaft...
Red to red and black to black, or it's ashes to ashes and dust to dust.
Jalessi, I always take alot of photo's.
Dynosor, hahaha! Good one.
here is a nice article about making crankshafts
Cirrus Construction Log: Crankshaft
heaps of other good advice on that place too
Frankeh,
Thank you very much for the AWESOME link to the Cirrus page, it explained all of my questions in superb detail!
Jeff...
Patience and perseverance have a magical effect before which difficulties disappear and obstacles vanish.
guys, on ebay there are quite a few guys selling avaition engine manuals of WW2 vintage for beer money on dvd, and they are bursting with blueprints. (i like that merlin and griffon engine!)
Cross valve cages off the list. HOLY CRAP!! there are alot of them!!
Steve,
Do you have a picture or diagram of how the valve cages fit in the engine and how they work?
Thank You
Jeff...
Patience and perseverance have a magical effect before which difficulties disappear and obstacles vanish.
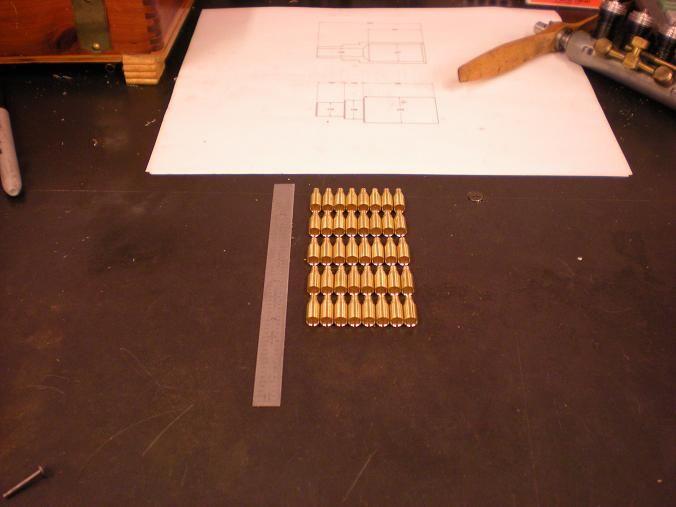
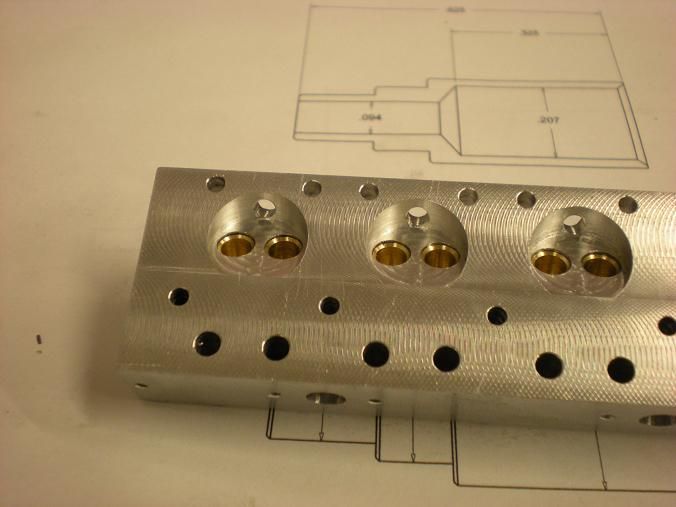
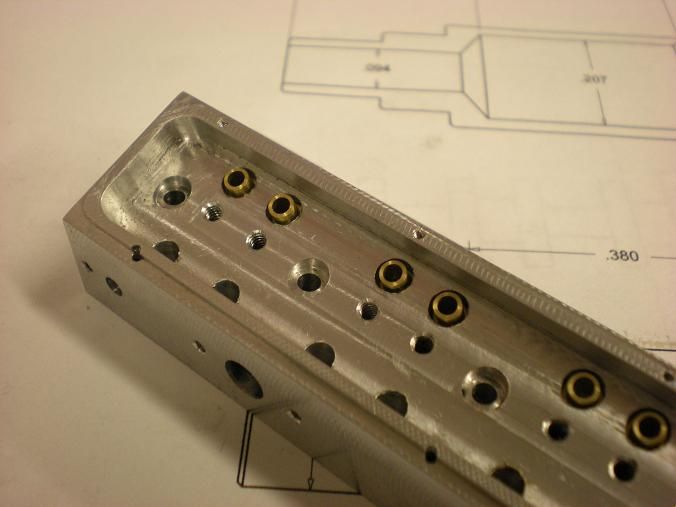
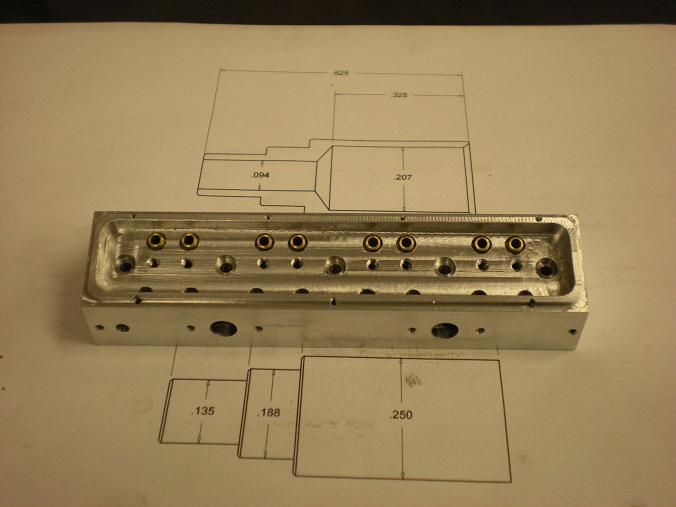
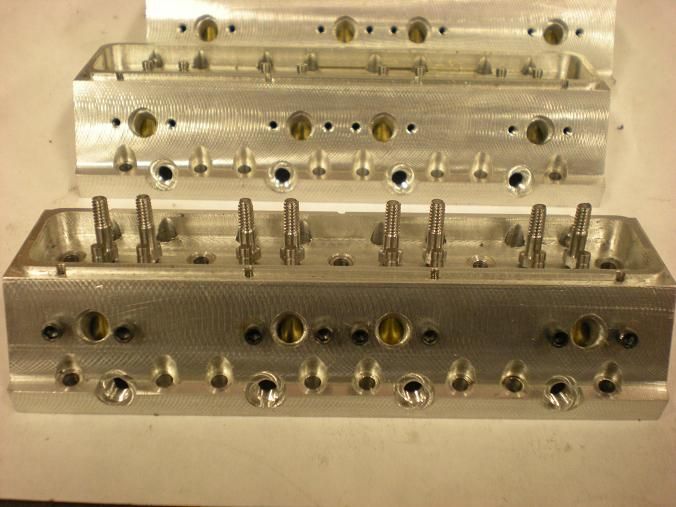
A valve cage is a valve guide, valve seat, and runner passage all in one. The cage is pressed into the head and then the intake or exhaust port is drilled thru into the cage. The fuel flows thru the head and passes thru the valve cage and into the head as long as the valve is open. The exhaust then flows thru the cage and the head to the pipes.
Steve,
I am assuming the reason for using valve cages is being more durable than aluminum and not having to replace the entire head if the guide or seat wears out.
Thank you for the detailed explanation.
Jeff...
P.S. the parts look awesome!
Patience and perseverance have a magical effect before which difficulties disappear and obstacles vanish.
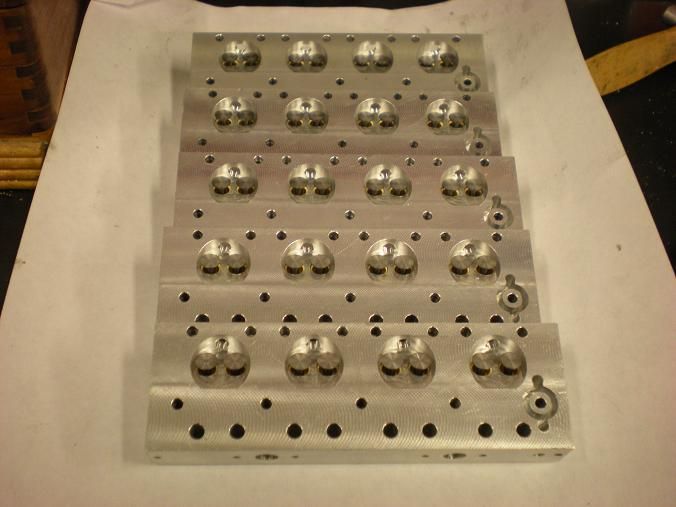
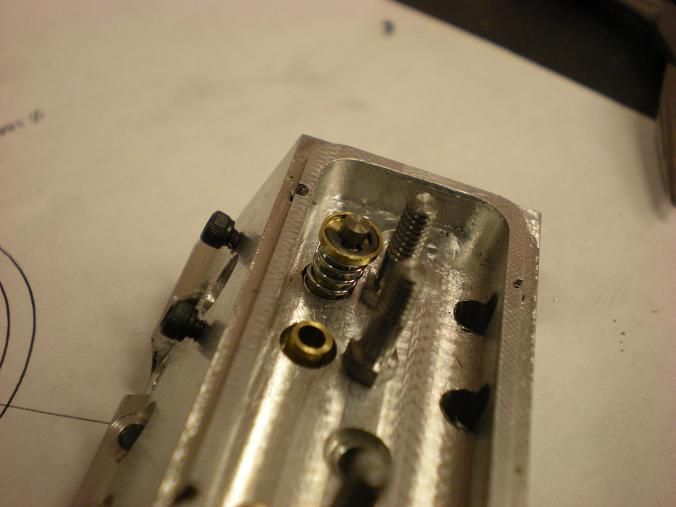
Hello All!
Spent the afternoon pressing in all the valve cages. I made s simple drive dool slightly smaller than the ID og the cage and pressed them in a drill press. I like the fact that the press fit does not need to be very tight because the cage cant be shot out by the compression of the cylinder.
I also started to make some valves. These wont go as fast as the cages.
Stand By!
Hello All!
Finished all the valves tonight. Everything went according to plan.
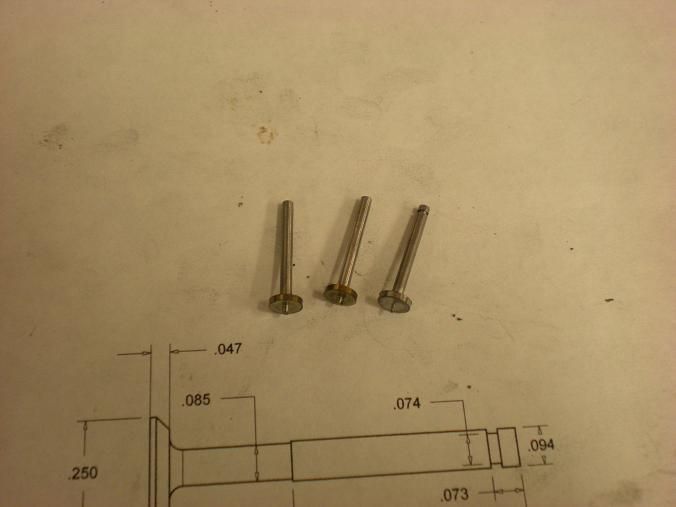
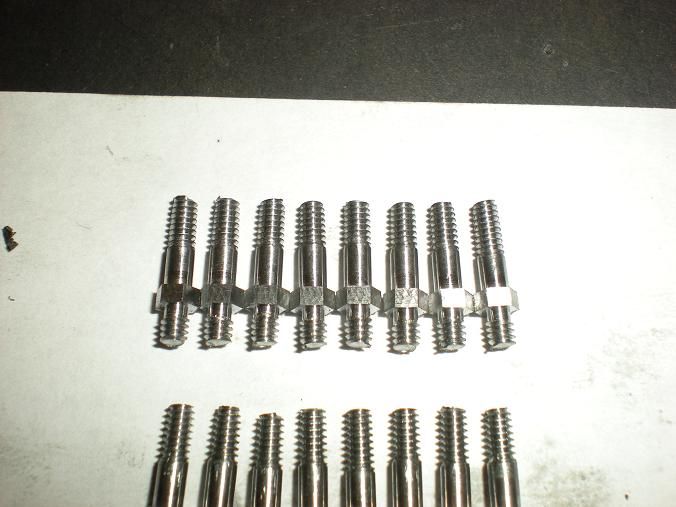
Had a little extra time so I got a jump on the rocker studs.
Awsome!
I assume some of the holes in the cylinder heads are for water cooling? Can you show more detail on cooling ducts and intake & exhaust ports?
Thanks
Red to red and black to black, or it's ashes to ashes and dust to dust.
Not really. All the cooling is in the block. The passage in the head is to pass the water from the block to the intake manifold so the water will appear to flow just like a real V8. Actually it will only make a loop thru the block.
Hi Steve
Beautiful work Steve
Ivy McNeil
I did not fail,I found 10,000 ways that dont work
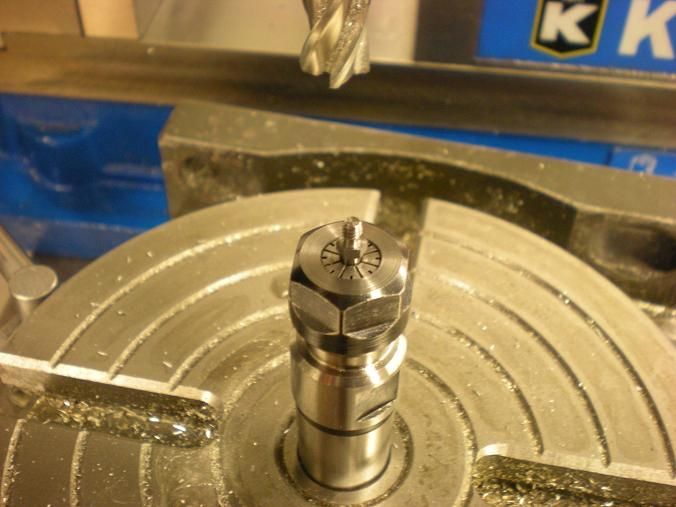
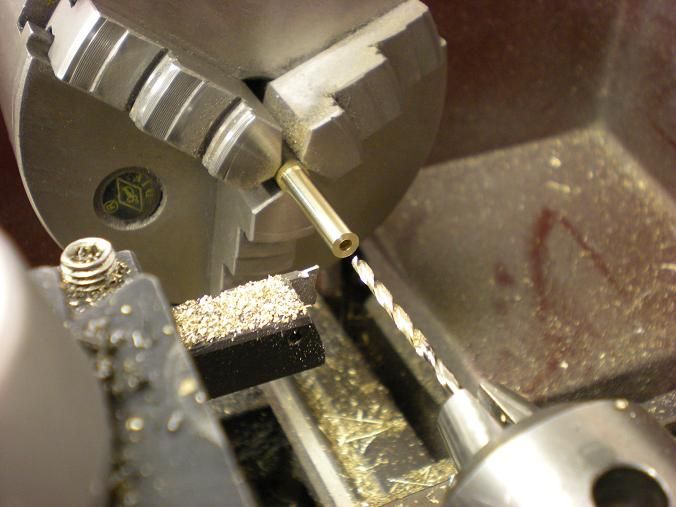
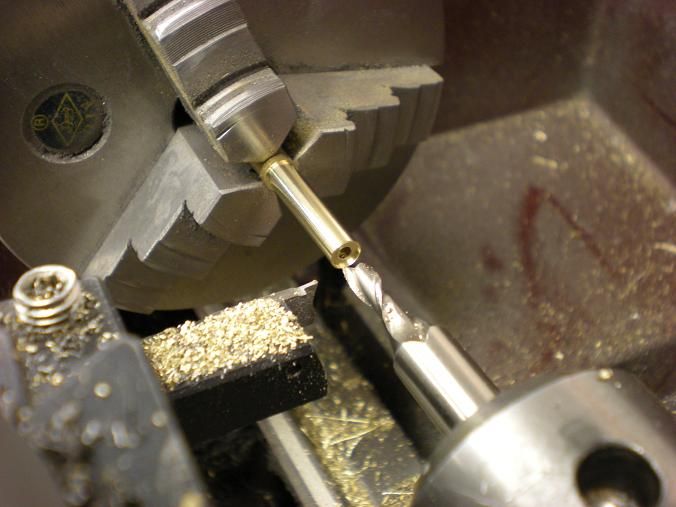
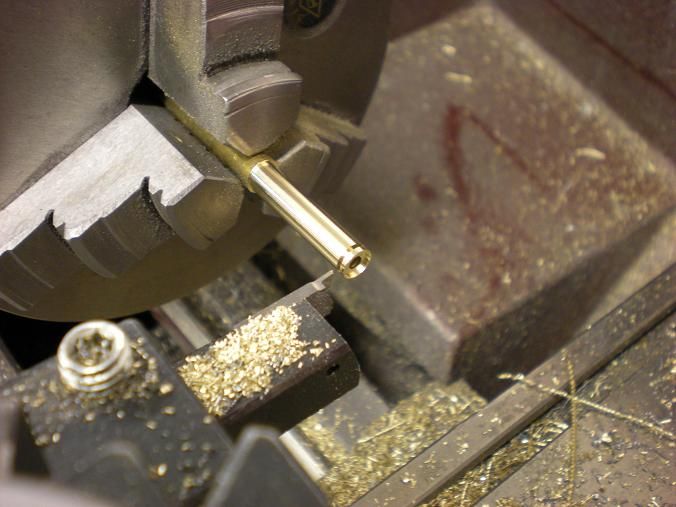
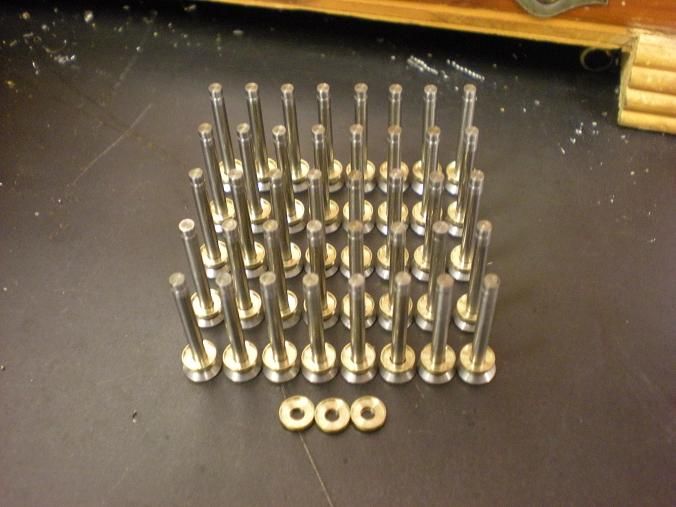
Hello All!
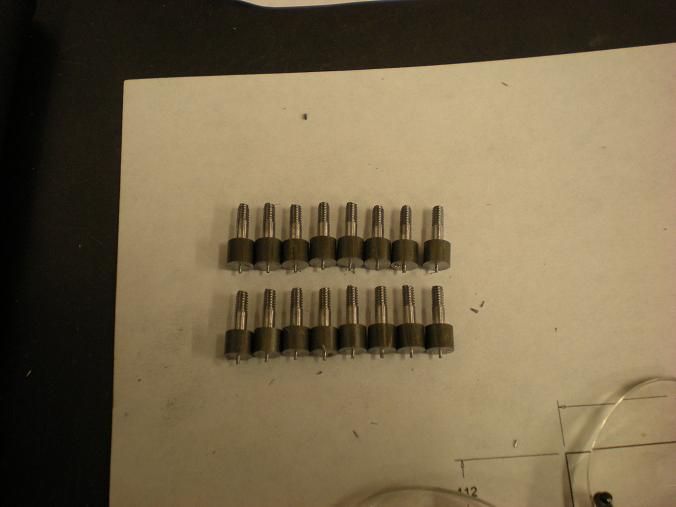
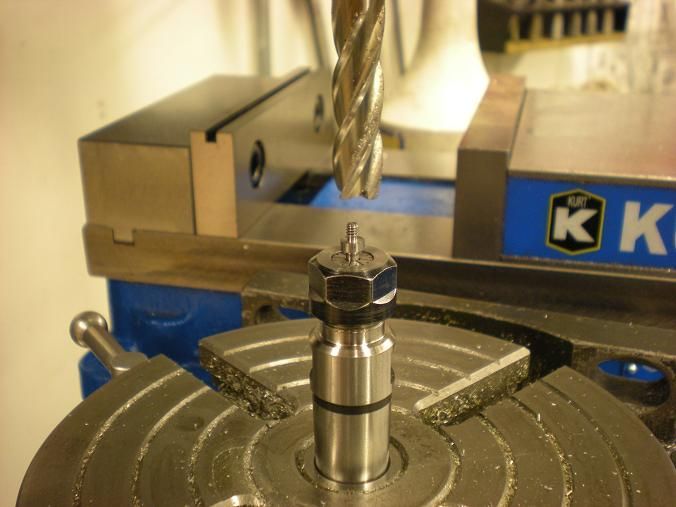
I finished all the bottoms and all that is left is to mill the hex on the shaft so they can be installed. For that I just used the rotory table in the mill with a collet holder in the center of the table. I have made 120 pieces in the last 2 weeks and now I have to make the valve spring retainers, 40 of them
Hello All!
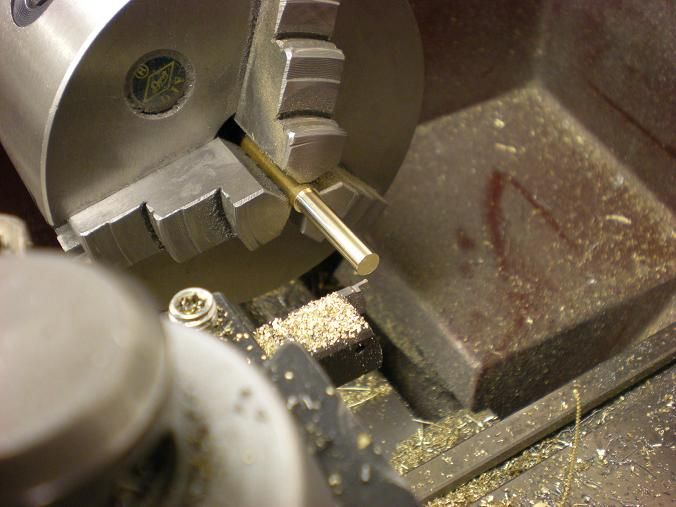
I made a few valve spring retainers this morning.
I turned the OD on a piece of 1/4 inch brass about an inch long and faced the end.
Then spot drilled and drilled the ID about an inch deep.
Then I used an endmill to make the flat bottom pocket for the spring clip.
Then I cut a groove deep enough to create the step in the bottom that will insert into the spring.
Then just move over the length of the step and part off the piece. Then starting with the step of making the pocket with the endmill, I continued until the inch of turned material was gone. It took 4 cycles of 1 inch of rod to make 43 pieces with 2 boo boo's.
That's it for the day. I have a half dozen or so club members coming over to hang out, eat, and brain storm about getting there stuff going. Should be a great day!!
 Posting Permissions