Reply with Quote
Nice, Steve!
What alloy did you use to cast? It looks like you have done it before?


I got the bug to make a few parts for the Demon blower. I have a lot of prototype parts but have never built one so I decided to make the intake manifold and go up from there. I used the manual mill to rough out the basic shape of the intake and then the CNC mill to start shaping things. It took 3 tools and about an hour and a half to get to this point.
I also made a pattern and poured a few cases for the blower.
I will most likely bounce back and fourth between this and the mini bikes so both builds will take twice as long now.
Similar Threads:
Nice, Steve!
What alloy did you use to cast? It looks like you have done it before?
Red to red and black to black, or it's ashes to ashes and dust to dust.
That is actually the firstcasting I have made that is going to get used. I have cast before but just for demo or making ingots.Originally Posted by dynosor

The alloy is just a bunch of scrap that was laying around the garage. What ever was in the melt bucket.
Pretty good results, especially for a first try. Can you post more details about your mold, ladle and melting method please.
This means you could cast your own engine blocks, if you wanted to, like these guys.
Note the pouring from the bottom of the crucible to minimize slag inclusions:
Red to red and black to black, or it's ashes to ashes and dust to dust.
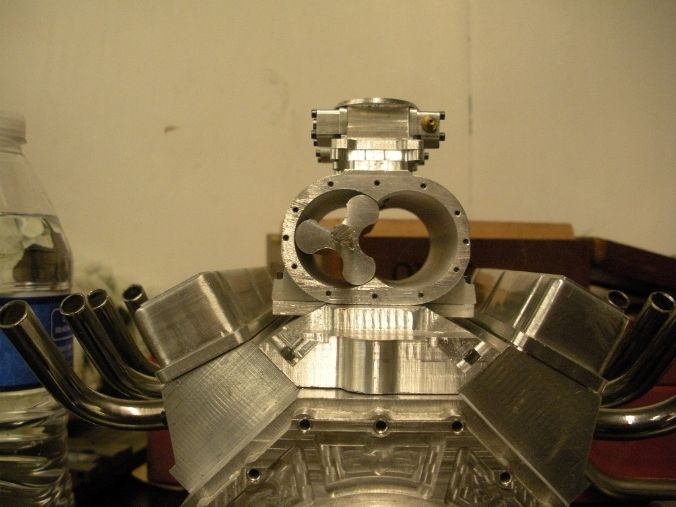
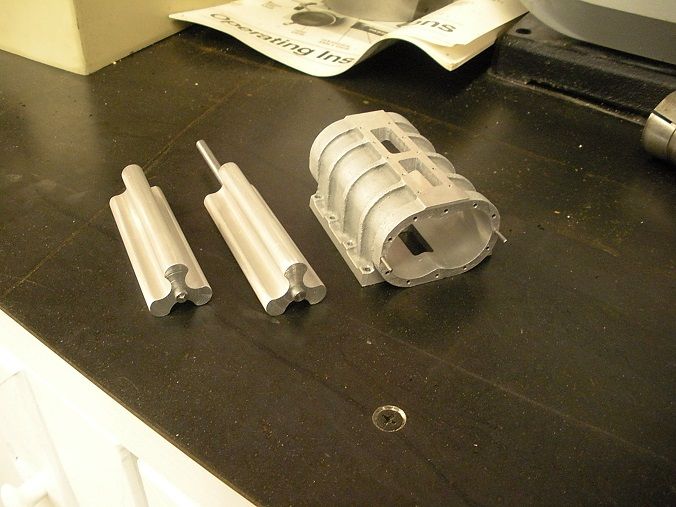
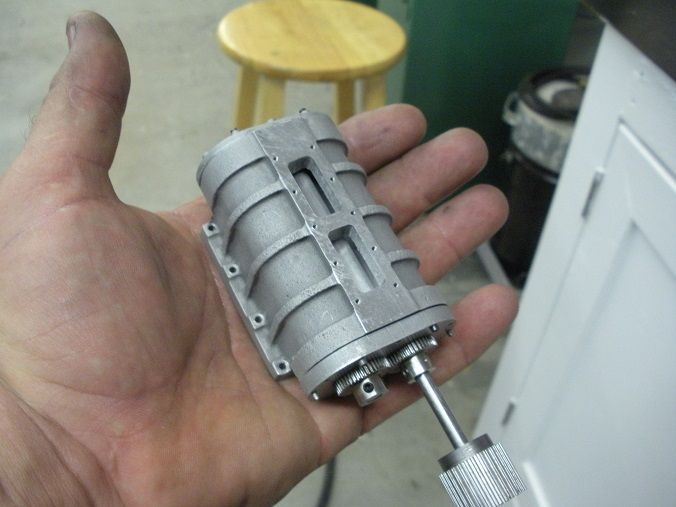
Got the top and bottom complete. I just need to drill the holes to mount it and port the blower to the cylinders.
The furnace is a 5 gallon bucket converted to a furnace. I use a steel pot to melt the metal. The pattern is just a simple wooden pattern made from maple. Standard sand casting with petrobond. This was done at the names show. The pour in the flask was the blower case and the pour in the bucket was a lost foam demo.
Awesome!
Thanks Steve.
Red to red and black to black, or it's ashes to ashes and dust to dust.
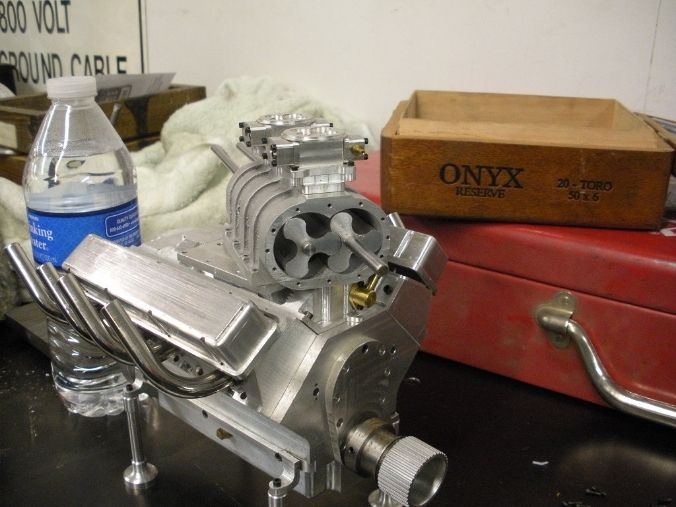
The intake is complete. The ports are drilled and the coolant passages are in. For the first time a blower is bolted to one of my demon blocks.
I'm liking it so far.
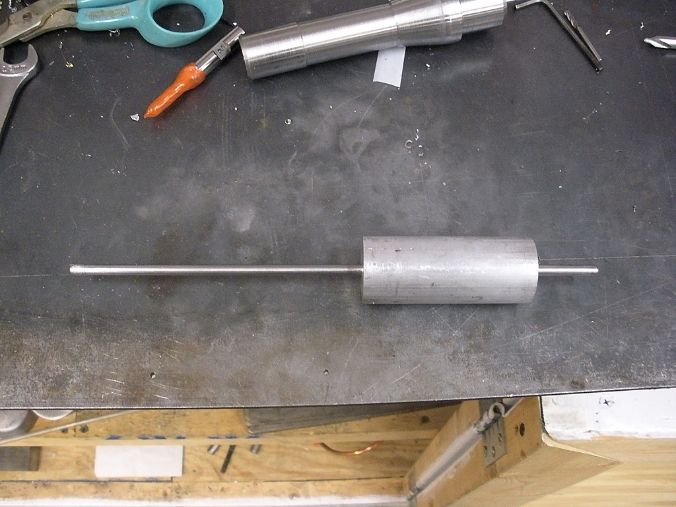
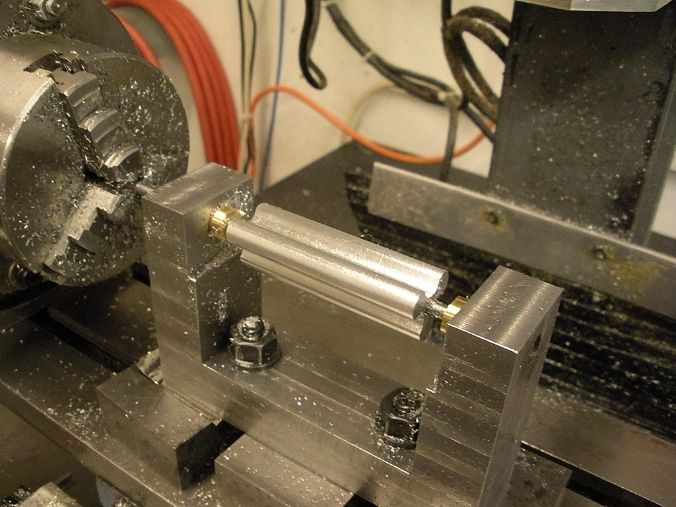
I have my blanks made up for the rotors. The length is dead on and the diameter is .125 inch larger than needed. The shaft is a pressed fit but I used a grooving tool and made some .010 deep grooves and filled them with loc-tite before i rammed the shaft thru.
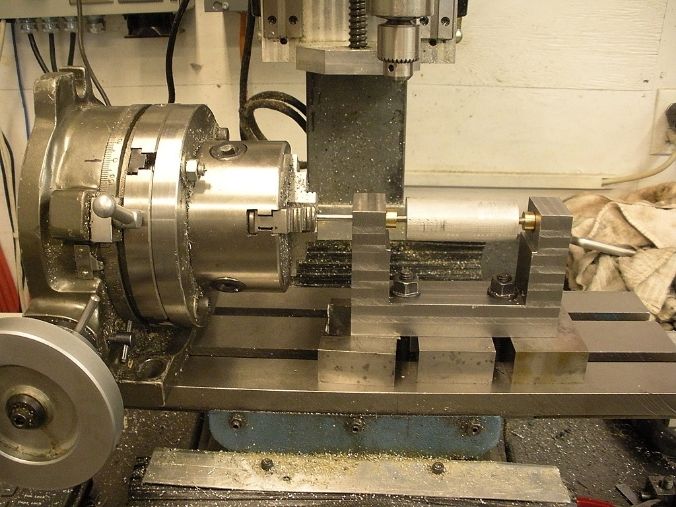
Here's my setup. The fixture is steel with brass bushings. I spent better than an hour shimming and tapping and indicating to make sure i am perfectly aligned. It's ready to go. If work gets rained out tomorrow I might take a run at one rotor. The RT is for rotating and holding position. The fixture does all the work. With a .188 shaft I didn't want to rely on the RT to support the work. I was worried about the center shaft flexing. I have only allowed .005 clearance in the case so I need all the advantage I can get.
WOW that is a sweet engine!
Thank You,
Paul G
Check out-
[URL="http://www.signs101.com"]www.signs101.com[/URL]
Thanks! It will be awesome if it works the way it's supposed to.
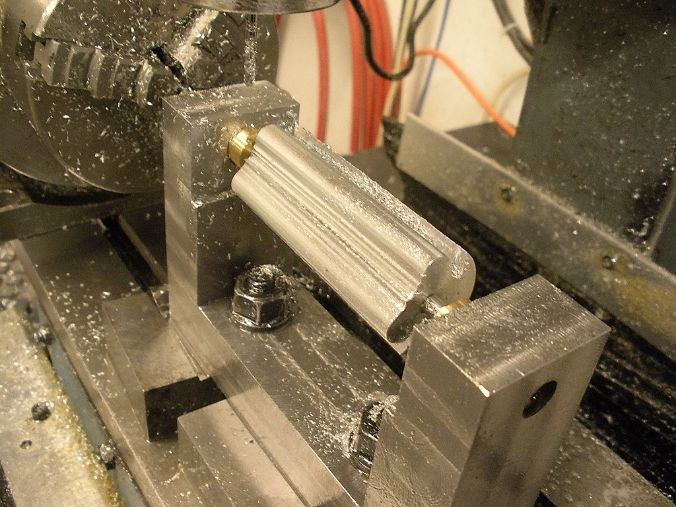
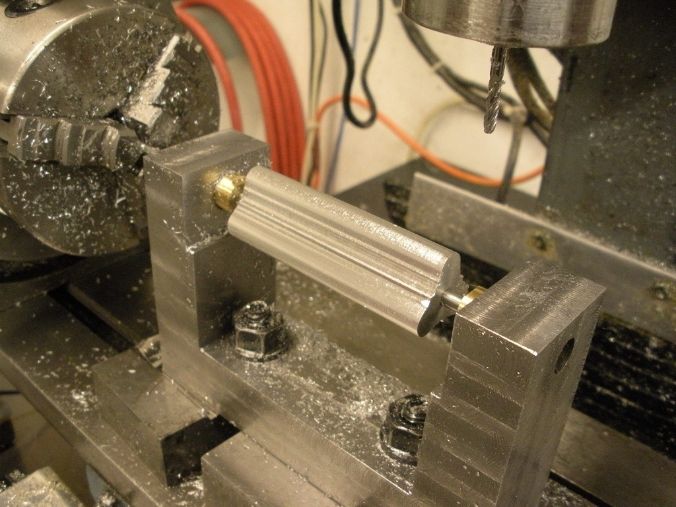
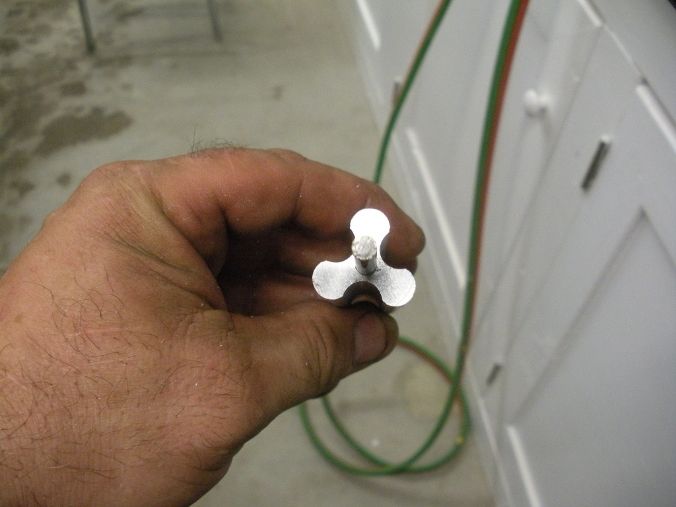
All went well with the first piece. In this extremely poor quality video you can see the blank has been rough cut and the profile of the lobe is getting cut into the blank. The profile gets cut and then the cutter steps over 3 thousands and cuts again. The cutter walks all the way down the length of the piece. The part is rotated 120 degrees and the same program is used 2 more times.
After 2 runs
After all 3 runs
Then the blank gets rotated 60 degrees and this program is run 3 times every 120 degrees. This one works the same way and cleans out the valleys.
If all goes well I hope to clean up, setup the second blank, and get it indicated in and ready to cut for friday.
Steve, what diameter cutter did you use for the blower impeller, at what speed? Assume it is a ball nose cutter?
Red to red and black to black, or it's ashes to ashes and dust to dust.
1/8 inch ball nose at 30 IPM with .0035 step over
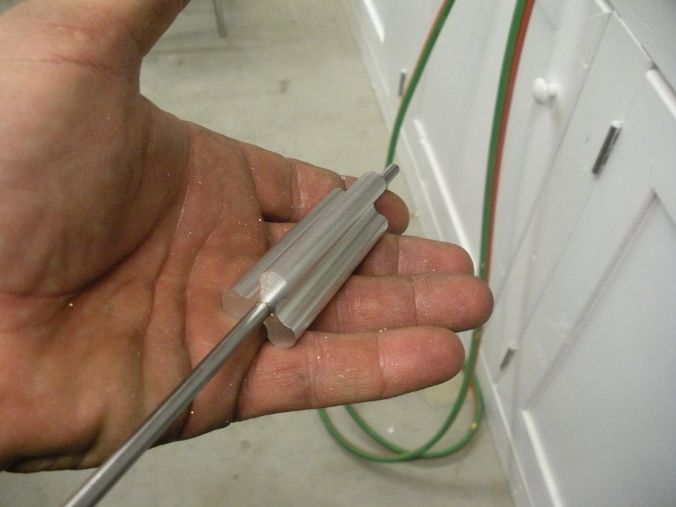
Well! It's official, I now have a pair.
They still need to be deburred and geared together so i can see how they run together. The fit seems very promising. I'm sure there will need to me some fine fitting with some fine grit sand paper.
Very nice work Steve.
One day when I get caught up on all the stuff that I have to do I can work on the stuff that I want to do.
Mike
Warning: DIY CNC may cause extreme hair loss due to you pulling your hair out.
I try to get out in the garage at least 2 nights a week after work to make something. If I do that I seem to make decent progress.
After 2 days of filing, dying, testing , and sanding, fitting, massageing, and tinkering, well you get the point. The rotors are fitted to the case. The rotors free spin and nothing touches nothing.
Last edited by stevehuckss396; 06-30-2013 at 03:16 PM.
Steve,
For some reason your images are not displaying here today - none of them.
I managed to see them at Photobucket by following the links visible when quoting your latest post.
Jolly good show!
Red to red and black to black, or it's ashes to ashes and dust to dust.
They will be back after the 6th of next month. I've exceeded my band width for the month and i'm too cheap to pay for more.