Build Thread Cheap laser cutter modifications. - Page 2


Page 2 of 5 FirstFirst 12345 LastLast
Results 21 to 40 of 97

Thread: Cheap laser cutter modifications.

  1. #21
    Registered
    Join Date
    Oct 2011
    Location
    UK
    Posts
    50
    Downloads
    0
    Uploads
    0

    Default

    The honeycomb you have is unlikely to be steel if it's in a laser cutter.
    The reflections are likely because the honeycomb's thicker walled (likely in larger cell honeycomb) or that it's getting on a bit and the top's damaged. You shouldn't really be getting much of a reflection cutting through any material if the speed and power settings are correct as there should be enough power to just cut through the material.
    How is the paper being affected by the honeycomb? I wouldn't have thought it would be a problem as you wouldn't be able to see the reflections and the paper's already been cut through?

    This is 3.2mm cell (one of the smallest you can buy) and 10mm thick though - just let me know if you decide you want some.

    Another update on my laser cutter coming later.


  2. #22
    Registered
    Join Date
    Oct 2011
    Location
    UK
    Posts
    50
    Downloads
    0
    Uploads
    0

    Default

    Today it doesn't seem like I did much


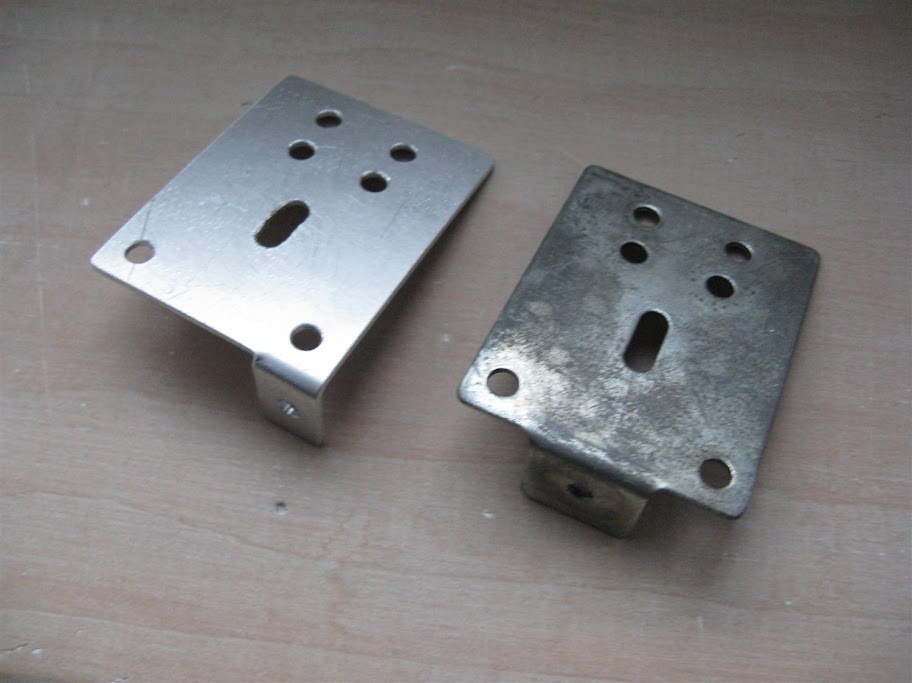
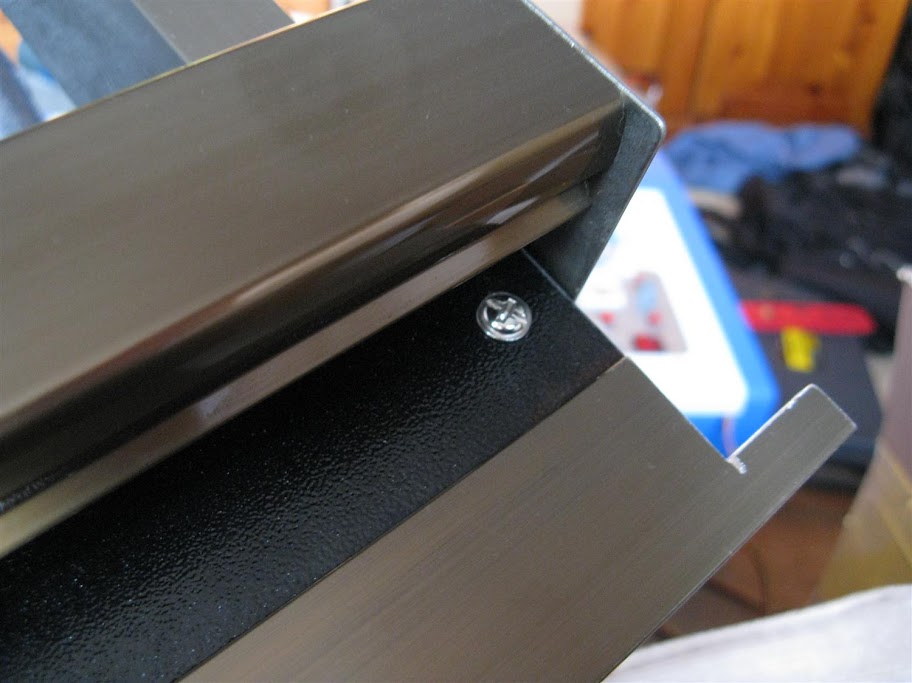
    I lengthened the holes in the base to allow a bit of Y movement of the XY bed.


    And I cut out the IEC plug holes and the fan hole which took absolutely ages with a drill and files...

    Looks pretty awesome though

    I'm currently in the middle of re-wiring the mains (and most other things) and putting things back together.

    A number of projects have caught my eye for a control system - I have a lot of ATMega based microcontroller boards so ideally I'll use one or two of them.
    GRBL, reprap, lasersaur, LAOS and a number of others are things I'm going to look at in more detail. I've been linked to a GRBL based reprap build which I think will be a good place to start - start ripping out the extras and adding in the laser cutter specific things. We'll see how that goes when I get to it though.


  3. #23
    Registered
    Join Date
    Jun 2009
    Location
    uk
    Posts
    146
    Downloads
    0
    Uploads
    0

    Default

    hi
    grbl isnt going to work for laser cutting as the speed is impossible to get smooth enough. Even with perfect settings there are quite perceptible accelerations and decelerations between points so the cutting depth is going to vary all the time.

    I used grbl to make a plotter though and its great for that...

    For my laser I am using emc. Its perfect. I bought a cheap motor driver board from ebay and better motors so I can run it much faster and more accurately at speed.

    rabbit / ls3040


  4. #24
    Registered
    Join Date
    Oct 2011
    Location
    UK
    Posts
    50
    Downloads
    0
    Uploads
    0

    Default

    Thanks for the advice, I wasn't aware of that. I presume the version they are using for the grbl based reprap software must have had sorted some of the speed problems (or be working on that) as even speed would be essential for even layers when printing.

    A new controller's still a while off yet anyway so I've got plenty of time to check out all the options.


  5. #25
    Registered
    Join Date
    Jun 2009
    Location
    uk
    Posts
    146
    Downloads
    0
    Uploads
    0

    Default

    hi

    with the reprap, grbl is ok because the nozzle head is flattening out the layers slightly as it lays them down, and also the head is moving a lot slower than a laser head so the changes in speed are less noticable.

    ( I only know this from experimenting with grbl earlier in the year- trying it for my laser - so maybe a future version of grbl will be better)

    When I tried using grbl, the speed of drawing a straight line was almost twice the speed of drawing a circle.
    I think grbl breaks the arcs into tiny segments which means a lot more processing going on which slows it down.

    I was really taken with the idea of a headless laser cutter, adding a sd card reader to the arduino to feed the gcode. So hopefully there will be a version that can be used with a laser

    Also the lasersaur (i think) was using grbl but changed later in its development.

    Your modifications look good though. I am looking at getting rid of the steel case and making an aluminium case which is much smaller and lighter.
    I have a larger 300 x 400 laser and there is a lot of empty space inside he machine. Also my z axis moves about 150 cm which I really dont need. So I can make the whole case shorter as well.

    rabbit / ls3040


  6. #26
    Registered
    Join Date
    Jun 2009
    Location
    uk
    Posts
    146
    Downloads
    0
    Uploads
    0

    Default

    ps I used the TB6560 3 axis controller in the end because it was cheap (£30) and easy to repair if it broke. I bought two new high torque motors as well to go with it which are a lot smoother at high speeds than the lasers original motors.

    I think the board fine as long as the input voltage isnt pushed to its top limit (36v) . I run mine at 24v. I bought mine from a UK source as well so it arrived the next day.


    There is a thread about the board on another forum on cnczone.

    rabbit / ls3040


  7. #27
    Registered
    Join Date
    Oct 2011
    Location
    UK
    Posts
    50
    Downloads
    0
    Uploads
    0

    Default

    I was also looking at getting one of those boards - might pick one up next month when I get paid again

    I have seen this video of the lasersaur using grbl on an arduino: Dank : Open source laser cutter Lasersaur using Grbl*
    I don't know what's happened to that. Simen (of grbl) sounds like like a nice helpful guy so I'm sure if there were/are problems with acceleration/speed then he might be able to help sort them out.

    I'd also be interested in a headless laser cutter although I'm still thinking of putting a mini-itx board in my machine.


  8. #28
    Registered
    Join Date
    Oct 2011
    Location
    UK
    Posts
    50
    Downloads
    0
    Uploads
    0

    Default

    OK so I made a bit of progress on the software last night - I had been having issues with the software not drawing anything but thanks to Phil [felice] I got some stuff drawn.

    There are still issues with importing/opening and CorelDraw so I think I'm going to have to go with Windows XP. I'll load that up this weekend.

    Meanwhile, with the hardware, I've got it all wired back up again and the laser still fires
    Been busy with other things though so it'll probably be the weekend before I get some more photos up - might even get it cutting shapes then!
    Still waiting for my cable chain though


  9. #29
    Registered
    Join Date
    Oct 2011
    Location
    UK
    Posts
    50
    Downloads
    0
    Uploads
    0

    Cool

    I've made a bit of progress on the build but my other new toy arrived on Thursday so I've been out playing on that...

    My new one on the right - been getting it good and muddy.

    Anyway - laser cutter wise, my replacement lens arrived:

    Umm, looks a little big... and scratched. Time to try again and test the ebay seller a bit more.

    This picture shows better the amount of space I left when I moved the board. All wired up and ready to go. Wiring colour scheme is retarded - red and black for L & N, or red and red for L & N, or red and black for signal...
    There are also two connectors that are the same with the same colour wiring. One's signal and one's 230V AC

    Then my cable chain arrived!
    Yeah it'll go something like that. Looks pretty big for the size of the machine but with the honeycomb grid and that it makes it look awesome!

    Newly modified mirror mount on attached to the opposite side of the stepper (so it's behind the X axis track). Yeah it hits the back of the chassis before the buffer stops it - I'm going to have to shift it forwards a bit anyway (might require a completely new mount) owing to how thick the mirror holder actually is.

    Then the mirror and lens holder will have to go something like that.
    I need to make a new mount anyway to attach the cable chain and other things to.

    I chopped some out of the aluminium section to allow the X axis track to get closer to the front of the machine (as the laser's now at the rear of it) - I'm going to have to remove more of it and the black section so as not to obstruct the top roller's path.

    With the front buffer removed, I get about 20mm more before the bearing holder hits the stepper pulley. I can hack a bit out of that but I'm not sure if it'll be enough. Like many of these modifications, it's going to be a tight one!
    My other option is to move the whole X track up slightly but that would involve moving the laser tube and first mirror up as well as modifying a bunch of other stuff so I'd rather not go there unless I really have to.

    All pictures (and extra ones) with captions are all still here: https://plus.google.com/photos/11491...53382930806001 if you want another look at anything.

    So my plan of maybe cutting by this weekend may have been a long shot but things are still moving on. Looks like it might be a few more weeks then - which is kinda good as I'll have been paid again so I can buy more cool stuff for this.


  10. #30
    Registered
    Join Date
    Mar 2011
    Location
    USA
    Posts
    20
    Downloads
    0
    Uploads
    0

    Default Drivers etc

    I have been following this post with interest. I have a chino laser. I was at a trade show and saw a USA laser there. I asked about the software. They said they were using corel draw and I asked about how it controlled the machine. They said they had a "printer" driver. you could use any software and simply print the object. I asked how they differentiated between the "scan" and the cut vectors. They used the "grey" scale to control the power of the laser and lines less than .008 were to be a cut vector.

    I have grown to dislike newly draw because of its inaccuracies and limitations. Does any one have suggestions for other "controller" software similar to the "driver" i mentioned and Control boards that can do the "scan" and control the laser power?


  11. #31
    Registered
    Join Date
    Oct 2011
    Location
    UK
    Posts
    50
    Downloads
    0
    Uploads
    0

    Default

    Quote Originally Posted by Autonow View Post
    I have been following this post with interest. I have a chino laser. I was at a trade show and saw a USA laser there. I asked about the software. They said they were using corel draw and I asked about how it controlled the machine. They said they had a "printer" driver. you could use any software and simply print the object. I asked how they differentiated between the "scan" and the cut vectors. They used the "grey" scale to control the power of the laser and lines less than .008 were to be a cut vector.
    Thanks for the interest
    Printer drivers are pretty typical for half decent laser cutters. Some use different colours for different powers (eg. the Universal laser sytems) or as you say, greyscale for anything that's not cutting.

    I have grown to dislike newly draw because of its inaccuracies and limitations.
    I don't think you 'grow to dislike' - I think most people simply hate it as soon
    as they try to use it
    Does any one have suggestions for other "controller" software similar to the "driver" i mentioned and Control boards that can do the "scan" and control the laser power?
    There are various controllers you can buy that are very expensive but as they would cost about the same as my laser cutter (excluding postage), I'm not going to go that way.

    I'm keeping a keen eye on the LAOS project which is a print driver setup with a networked control board for the laser cutter.
    Laser Open Source (LAOS)

    I'm kinda hoping if I spend long enough modifying this thing, by I'm ready to use it the LAOS project might be finished

    My laser cutter has MoshiDraw (as you may have read above - just as bad as NewlyDraw) and I've linked it to CorelDraw (which makes it bearable apart from crashing - I need to install XP for it really) but I'm not thinking of using that long term.
    I'll see where I go with the software anyway - I haven't got any real plans yet.

    Oh and the eBay seller response was basically to use sandpaper to make it the right size... I haven't had a response to my reply to that (basically telling them that I wasn't even going to try and to send me another one and it's scratched anyway). I'll send them another message threatening to open an eBay case against them if they don't sort it out soon - Might move them along a bit. Of course I knew the warranty stated was a load of crap but I'm still hopeful they won't be a completely useless seller.

    Right, more updates hopefully coming this weekend - watch this space.


  12. #32
    Registered
    Join Date
    Aug 2005
    Location
    Sweden
    Posts
    62
    Downloads
    0
    Uploads
    0

    Default

    The first lens looks bad but its just on the sides, the area where the beam hits looks fine so maybe it will work anyway. Try it on a piece of paper at low power settings so you can see the shape of the beam and if it has any artifacts from the lens in it.


  13. #33
    Registered
    Join Date
    Oct 2011
    Location
    UK
    Posts
    50
    Downloads
    0
    Uploads
    0

    Default

    Oh the lens that came with the laser cutter 'works' but that's not the point. It arrived damaged so should be replaced.

    Anyway - sorry, no update today - I did a bit of work on the interface and electronics (things which aren't very visible yet) and only minor hardware changes. I'll try get more done tomorrow for an update.


  14. #34
    Registered
    Join Date
    Oct 2011
    Location
    UK
    Posts
    50
    Downloads
    0
    Uploads
    0

    Default

    Ok so first thing's first. I got a response from the ebay seller telling me that they would give me a $10 refund... Yeah lenses cost rather more than that.
    The saga continues.

    Meanwhile I got a few things done.


    Not everything on the machine's cheap Chinese stuff.


    I hacked a bit out of the X track bearing mount so that it misses the belt pulley.

    About 1mm of clearance.

    The other side was also an issue.

    So I remade the bracket in aluminium and moved the belt mounting screw.
    Plenty of room for the pulley now.


    Those modifications allow me to get right up to the front of the machine to help me in my quest to get the largest bed size I can.


    I had a bit of a play with some displays - not sure whether to go with a 40x4 or not.
    I can't think of a massive amount to stick on it but I have one waiting for a project.
    I suppose I can probably display job time, tube hours, temps, flow, umm... Any other ideas or should I just go with a 16x4 or something?


  15. #35
    Registered
    Join Date
    Oct 2011
    Location
    USA
    Posts
    18
    Downloads
    0
    Uploads
    0

    Default

    Quote Originally Posted by mowcius View Post
    With the X/Y assembly out I gave it a clean and had a look at the rollers (among other things). A few observations/comments:

    The bottom rollers/bearings for the X axis track don't actually touch the Y axis track and the top roller has also been put on bent which might mess up my focusing if the track's not level.
    My laser cutter had a similar problem. This caused the X motion to be angled towards the front of the machine creating slight parallelogram shape instead of squares when cutting. I discovered the problem was the belt was setup a couple teeth further towards the front on the that bracket. This caused the bracket to be angled and not connect properly in addition to preventing the X gantry from being square. To fix it I removed the rear roller on the belt removed the bracket and reattached. Once it was in square I put the belt back on and tensioned it. My travel is now square and the roller actually work. Anyone else getting these models should probably check this before using.


  16. #36
    Registered
    Join Date
    Oct 2011
    Location
    UK
    Posts
    50
    Downloads
    0
    Uploads
    0

    Default

    If you buy one of these you really need to be prepared to check the machine over and be reasonably competent as taking the X/Y assembly out and getting it back in isn't exactly easy!

    Now that I've completely replaced that bracket I'm pretty sure it's square but I need to check it over again and make sure it's level when I put the whole machine back together.


  17. #37
    Registered
    Join Date
    Sep 2011
    Location
    Brasil
    Posts
    29
    Downloads
    0
    Uploads
    0

    Default Changing the board controller

    Hello Mowcius,
    Very good thread, you are doing a great job.
    I have exactly the same machine and gonna do some changes like you´re doing, but the biggest change you need to do is the Controller board.
    I´ve bought a TB6560 and it is set aside for awhile and I´m just planing how to install it in my machine. The big chalange I see is firing the laser using the board relay with Mach3.
    Thank you for show us your job
    Raphael


  18. #38
    Registered
    Join Date
    Jun 2009
    Location
    uk
    Posts
    146
    Downloads
    0
    Uploads
    0

    Default

    I would recommend using emc rather than mach3

    mach3 has a (small) delay built into its m3 m5 commands so doesnt fire the laser at the right time. The only way to do it is with work arounds.

    Emc doesnt have this delay so is fine for lasers.

    You can just connect the board directly with the parallel port and use the spindle off on commands without any problem. Just make sure the relay is connected to the correct wire to trigger the laser. It took a while to trace all the connections.

    rabbit / ls3040


  19. #39
    Member Tweakie's Avatar
    Join Date
    Nov 2009
    Location
    United Kingdom
    Posts
    707
    Downloads
    0
    Uploads
    0

    Default

    The big chalange I see is firing the laser using the board relay with Mach3.
    You would be wasting your time if you tried using the relay.
    If you want to use Mach3 then you should use the Z Axis direction pin to fire the laser.

    Tweakie.

    CNC is only limited by our imagination.


  20. #40
    Registered
    Join Date
    Sep 2011
    Location
    Brasil
    Posts
    29
    Downloads
    0
    Uploads
    0

    Default

    Quote Originally Posted by Tweakie View Post
    You would be wasting your time if you tried using the relay.
    If you want to use Mach3 then you should use the Z Axis direction pin to fire the laser.

    Tweakie.
    Tweakie,
    You could show us how to plug a laser power source to a TB6560 to fire the laser.
    I never see anyone showing this clear, you could be the first one.
    Thank you
    Raphael


Page 2 of 5 FirstFirst 12345 LastLast

Tags for this Thread

Posting Permissions

  • You may not post new threads
  • You may not post replies
  • You may not post attachments
  • You may not edit your posts
  •  


About CNCzone.com

    We are the largest and most active discussion forum for manufacturing industry. The site is 100% free to join and use, so join today!

Follow us on


Our Brands

Cheap laser cutter modifications.

Cheap laser cutter modifications.