New Machine Build DIY router 2X4 fun


Results 1 to 16 of 16

Thread: DIY router 2X4 fun

  1. #1
    Member
    Join Date
    Jan 2008
    Location
    United States
    Posts
    88
    Downloads
    0
    Uploads
    0

    Default DIY router 2X4 fun

    I am in the middle of constructing a 2'x4' router based on 1/2" black pipe and roller bearings. I was starting to question my sanity with this, but it is going well enough that I will probably finish in the next month or so, so I might as well see it thru to the end.

    Thought I'd share what I have done so far and see what y'all think, attached a snapshot and you can see more details here: http://grumpygeek.com/?p=180

    Thanks,
    GrumpyGeek

    Similar Threads:
    Attached Thumbnails Attached Thumbnails DIY router 2X4 fun-insaneornot-jpg  


  2. #2
    Registered FandZ's Avatar
    Join Date
    Oct 2008
    Location
    USA
    Posts
    1147
    Downloads
    0
    Uploads
    0

    Default

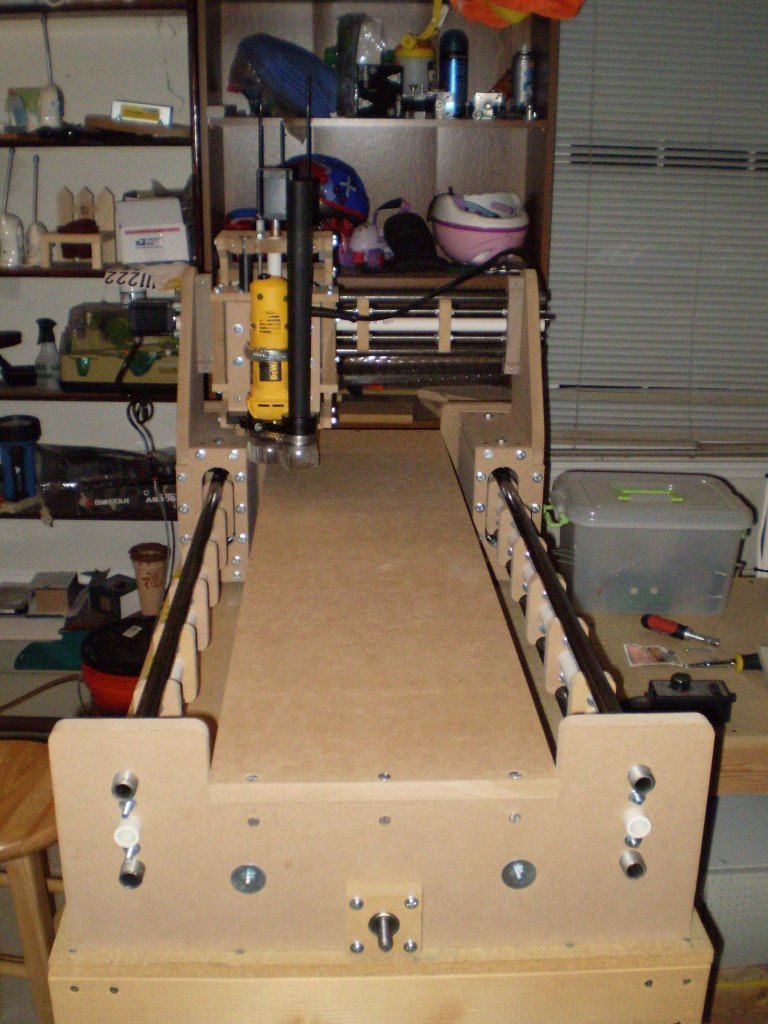
    Wow, you really put some work into it. Looks great. I like the colors. I'm guessing you cut out all those parts with a router. I doubt I could do anything as clean by hand.

    Don't question your sanity, it'll be all worth in the end. Besides, how will you build your second cnc machine without the help of your first? Haha... But by the looks of the one you are building, I'm guessing you will get plenty of use out of it before you build another one. Nice job.

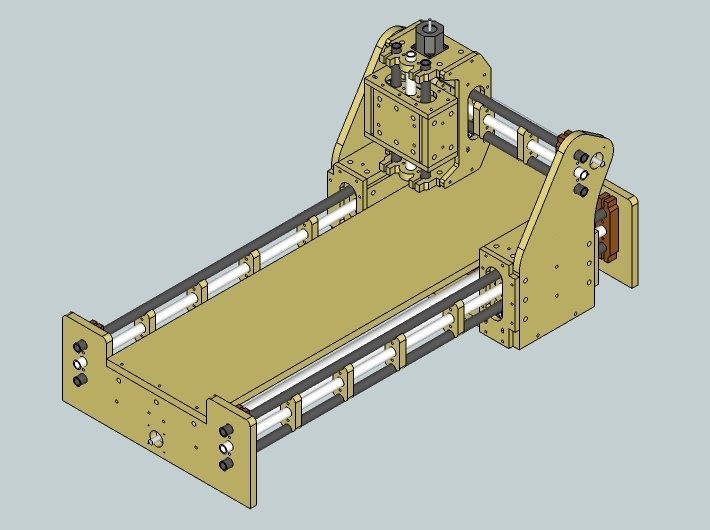
    Oh a quick Q, is that PVC pipe in the middle of the rails? If so, why didn't you go with a metal pipe?


  3. #3
    Member
    Join Date
    Jan 2008
    Location
    United States
    Posts
    88
    Downloads
    0
    Uploads
    0

    Default

    Thanks, this is actually my second machine. The first is a Rockcliff model D that I built with basic power tools, clamps and glue; it works well, this is my first attempt at something bigger and faster.

    I used the first machine to cut the pieces, which were designed in a very basic cad program (CadStd) and translated to G-Code with Cut-2d. The center pipe is pvc, it is actually used more for lining everything up and holding it in place while assembling the rails, it will also make a good conduit for running power and limit switch wires. I could replace it with metal pipe as well, and I might if I think it will help with the rigidity, but for now I think the 2 pieces of 1/2" pipe is doing a good job.

    My next challenged is to complete the lead nuts and couplers. I think I have a good start on the lead nuts, I will either be using some nylon spacers, or some 1.5" acetal round stock that I will tap with a 1/2-10 ACME tap... I found that making a jig using a cnc machine allows very accurate placement of the needed holes in the spacers/round stock. Finding parts to build the couplers with is causing a bit of a headache, any suggestions would be appreciated, I am going from the 1/4" motor shafts to 1/2"-10 acme screws, I was looking to use a few tubes like this: http://buildyourcnc.com/diycoupling.aspx, but I am having trouble finding a supply of aluminum tube of the right diameters.

    Time is not really the enemy here, the longer this takes the more likely it is that I will be able to buy new electronics rather then strip them off the first machine... of course this goes against the natural urge to get it finished and running NOW

    Oh well time to do do the real job so I can afford to this in the first place...<*sigh*>

    -GrumpyGeek

    Last edited by grumpygeek; 10-05-2009 at 08:28 AM. Reason: missing/wrong words


  4. #4
    Registered
    Join Date
    Apr 2009
    Location
    USA
    Posts
    3
    Downloads
    0
    Uploads
    0

    Default

    Very cool.. I hope to build my own. Good luck on this build.


  5. #5
    Member
    Join Date
    Jan 2008
    Location
    United States
    Posts
    88
    Downloads
    0
    Uploads
    0

    Default DIY ACME lead nuts

    I have completed the 1st of 4 DIY ACME 1/2"-10 lead nuts for this machine. The first attempt uses nylon spaces, take a look here http://grumpygeek.com/?p=240 if you are interested.

    -GrumpyGeek


  6. #6
    Registered FandZ's Avatar
    Join Date
    Oct 2008
    Location
    USA
    Posts
    1147
    Downloads
    0
    Uploads
    0

    Default

    That's an awesome writeup and an awesome contribution for the diy cnc community. Thank you for sharing.

    Looking at it, I don't think it would be too hard to add 4 slots on one end and add some clamping force to help with back lash. Just a thought. That's how cncrouter parts does there, but I have read a review where they did say there was some backlash with their nut. http://cncrouterparts.com/product_in...products_id=37


  7. #7
    Registered
    Join Date
    Apr 2009
    Location
    USA
    Posts
    3
    Downloads
    0
    Uploads
    0

    Default

    Love to see creative stuff.


  8. #8
    Member
    Join Date
    Jan 2008
    Location
    United States
    Posts
    88
    Downloads
    0
    Uploads
    0

    Default Build update

    Managed to do a little more work on the machine yesterday, posted an update on my site if you are interested: http://grumpygeek.com/?p=293

    Thanks,
    GrumpyGeek


  9. #9
    Member
    Join Date
    Jan 2008
    Location
    United States
    Posts
    88
    Downloads
    0
    Uploads
    0

    Default Been almost a year

    I noticed that it had been almost a year since I started work on this router, in fact it has been almost 6 months since I did much work at all on it. But that is about to change, I just finished assembly and I expect to have my first run within the week. If nothing tragic happens I'll post some video... actually if something tragic happens I'll post that as well

    Here is a link to the update on my website if you are interested: http://grumpygeek.com/?p=415

    -GrumpyGeek


  10. #10
    Member
    Join Date
    Jan 2008
    Location
    United States
    Posts
    88
    Downloads
    0
    Uploads
    0

    Default First Cut Video

    Here is the first cut video:

    [nomedia="http://www.youtube.com/watch?v=Qu9t9p3yCxc"]YouTube - DIY CNC Router First Cut[/nomedia]


    This was the second attempt, on the 1st attempt I didn't notice the Z axis was homing above 0. I managed to cut a nice line in the material and put 3 holes well into my spoil board, but not into the table before I stopped it. At least nothing broke.

    The parts being cut are for the next iteration of this machine, I am hoping to make it easier to assemble, faster, and reduce the flex in the Z axis, which is no worse than the Mini Rockcliff model D I built (which is probably due to the maker not the model D design), but I thought it would be better.

    I also added an entry on my site that covers the final steps of getting it ready to run, which included creating the vacuum shoe.

    Of vacuum shoes and coat hangers

    It is nice to finally be done (mostly)

    -GrumpyGeek


  11. #11
    Member
    Join Date
    Apr 2003
    Posts
    550
    Downloads
    0
    Uploads
    0

    Default

    Really nice work, thanks for sharing!


  12. #12
    Member
    Join Date
    Jan 2008
    Location
    United States
    Posts
    88
    Downloads
    0
    Uploads
    0

    Default

    So less than a month after I finish my last machine I am starting to build the next iteration. I have modeled it in SketchUp and thought I would solicit opinions before I start cutting (for a change). Please take a look and tell me what you think, and any recommendations you might have. In particular I am looking for alternatives to cross dowels, not that I have anything against them, but a cheaper alternative you be nice.

    I have posted more images and a rotatable drawing here: grumpygeek.com » Blog Archive » New build if you want a more detailed look.

    Thanks,
    GrumpyGeek


  13. #13
    Registered
    Join Date
    Mar 2010
    Location
    Dominican Republic
    Posts
    3
    Downloads
    0
    Uploads
    0

    Default

    QUisiera fabricar mi propio touter quien podria, colaborar...


  14. #14
    Registered
    Join Date
    Mar 2009
    Location
    Australia
    Posts
    27
    Downloads
    0
    Uploads
    0

    Default CNC Machinist

    Quote Originally Posted by Adelmi View Post
    QUisiera fabricar mi propio touter quien podria, colaborar...
    Si yo hubiera conocido este sitio cuando comence la construccion de mi primer router, todo hubiera sido mas facil. Cuando lo encontre se solucionaron muchos de mis problemas. Es por eso que hoy te ofrezco mi ayuda en lo que pueda.
    Que es lo que tienes en mente ? Tamaño Rigidez. Que materiales deseas emplear?
    Guillermo.


  15. #15
    Member
    Join Date
    Jan 2008
    Location
    United States
    Posts
    88
    Downloads
    0
    Uploads
    0

    Default

    I just realized I hadn't posted any updates to this thread in a while, which I guess is the hazard of posting updates to your own site. I am about a week away from having the newest machine up and running, it looks just like the sketchup drawing. Take a look if you care to here: 2 Week Progress Report.

    Thanks,
    GrumpyGeek


  16. #16
    Member
    Join Date
    Jan 2008
    Location
    United States
    Posts
    88
    Downloads
    0
    Uploads
    0

    Default

    Almost done with this build, just need to figure out a clamping mechanism and I should be up and running.


    Take a look here if you are interested in more detail: 6 Week progress report

    Thanks,
    GrumpyGeek


Tags for this Thread

Posting Permissions

  • You may not post new threads
  • You may not post replies
  • You may not post attachments
  • You may not edit your posts
  •  


About CNCzone.com

    We are the largest and most active discussion forum for manufacturing industry. The site is 100% free to join and use, so join today!

Follow us on


Our Brands

DIY router 2X4 fun

DIY router 2X4 fun