Reply with Quote
twocik, I don't think that it would be a successful job for a Tormach. There are a couple of challenges.
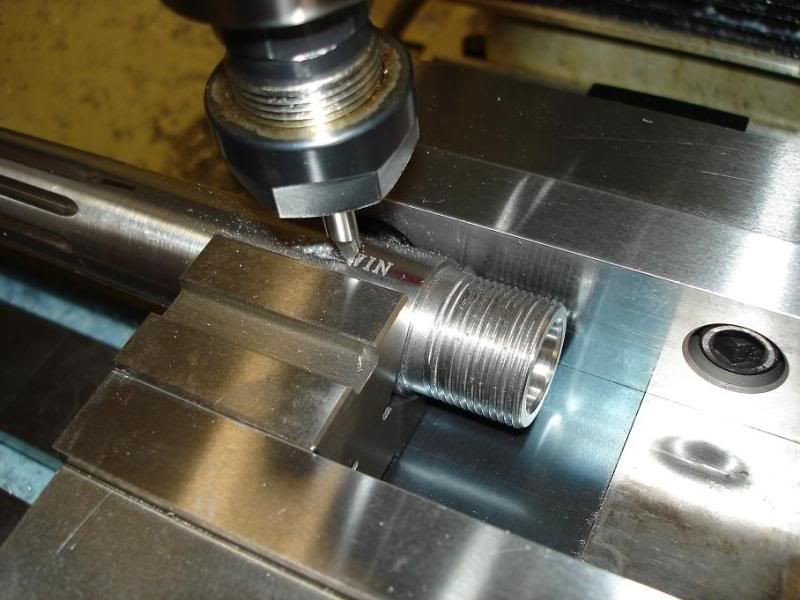
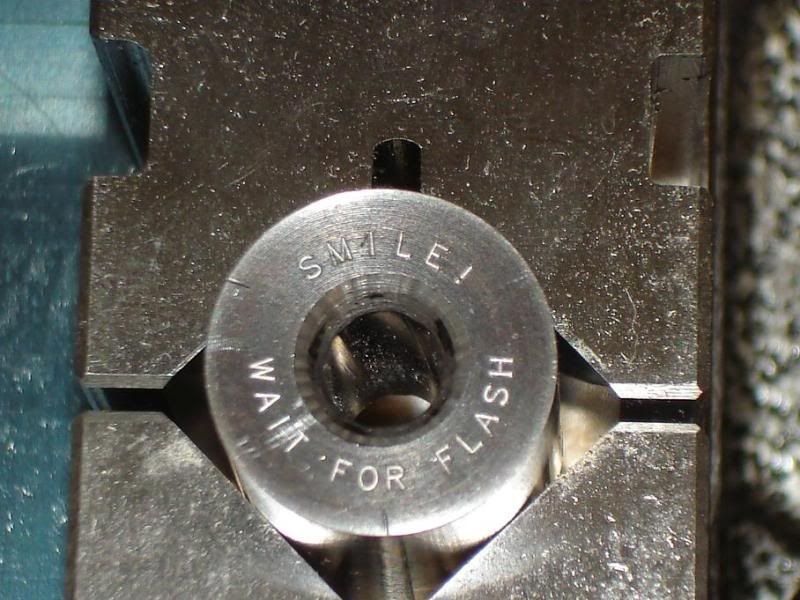
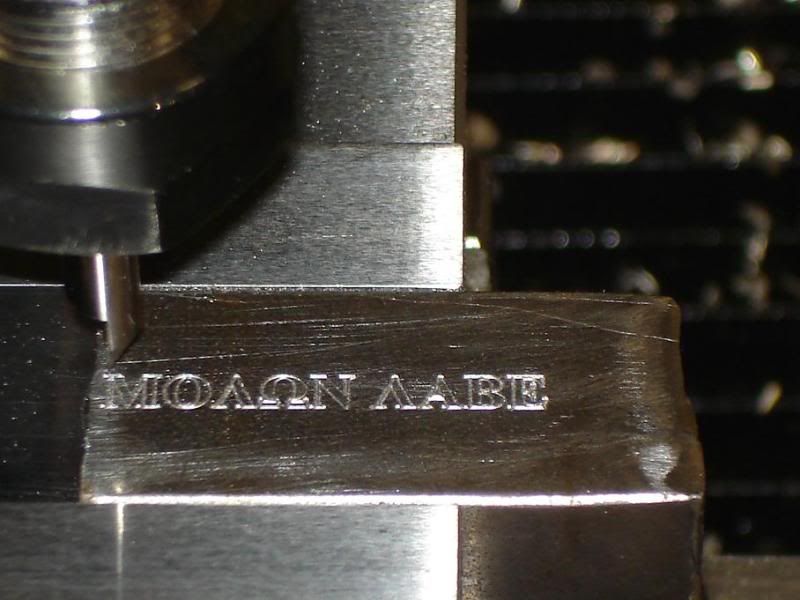
To mill the lettering, you will want to use a simplified, "pen plotter" type of font and a very small cutter to keep the stroke width proportional to the font height. I'm attaching a picture of a toolrack I made the other day for my Proxxon tools. I used the Proxxon to do the lettering with my Tormach. The font is a single-stroke and you'll notice that the ends of all the strokes are round, due to the cutter radius. The material is aluminum and I was running a .020" endmill at 20 krpm and 2.8 ipm. The numbers are about .20" high, much larger than text on a business card, so you would likely need to use a .010" max cutter to do the lettering. Not necessarily a problem--I've used down to .009" ballmill with my Proxxon but I have installed a ceramic hybrid nose bearing to reduce the bearing clearance (the Proxxon uses a single spindle bearing).
Those business cards are stainless steel, probably .010" thick. They're more than likely photoetched, given the appearance of the half-relief lettering and logos. Say you were going to machine the card. First you need to figure out how to hold such a thin sheet perfectly flat. You'd likely want to mount a backing sheet, flycut it flat and then use thin double-sided tape to hold the rawstock down. A .010" 2-flute endmill in SST wants 30 krpm and 2 ipm, so if you ratio that down to the Proxxon's maximum 20 krpm you get 1.3 ipm. That will take a while to do. The numbering on my tool holder took about 10 minutes. I cut the sloped surface (with the primary spindle) and machined the letters (with the Proxxon) in the same clamping. The numbers are .010" deep, done in two passes of .005" deep. I was maybe too conservative and might have done them in one pass of .010" deep, but I didn't break a cutter so I'm satisfied.In stainless with a .010" cutter I'd probably do passes of no more than .0025" or so for two passes for a total depth of .005"--maybe someone with more expereince will have better advice.
You can of course drill the thru holes but you'll probably want to stop every few holes and wipe the adhesive residue off the drillbit with a solvent-soaked rag so it doesn't grab and break.
But I'd photoetch the cards myself. I could
Do post pictures if you try some cards! I'd like to see how they come out.
Randy